

Connect servo and operate with smartphone
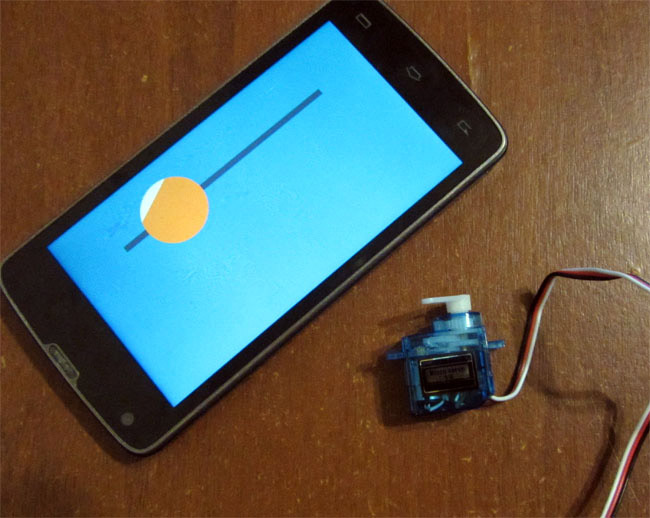
In this article you will learn how to use this service RemoteXY very easy to control servos. We servo controlled with a visual control "slider".
About what is a servo. This motor with gear and control scheme in a single package. The output we get a controlled movement of the shaft of the gearbox. To manage such a movement, the servo has a dedicated input control signal. The signal consists of a pulse of a certain duration, which should be repeated 50 times per second. Temporal pulse width will determine the position of the servo output shaft to which it tends to turn the engine. That is asking a specific pulse width and repeating it 50 times per second, we can expect that output shaft servo take some desired position.
The average position of the output shaft of the servo pulse duration corresponds to 1500 ms. It 500 ms far left, 2500 ms far right. We do not have to manually generate a sequence of pulses for our servos, we use Arduino library "servo.h", which will do all the work for us. We only point out to her what the pulse width, we need at any given moment.
There is one feature of the use of the library "servo.h". It can not be used in conjunction with a library of software serial port "SoftwareSerial.h". These libraries use the combined resources of the microcontroller. Servos will twitch, as maintaining a constant pulse duration will be impossible. To solve this problem to communicate with library RemoteXY configure a hardware serial port.
However, the hardware serial port using pins 0 and 1 are used to program the chip. If these pins to connect the Bluetooth module, the programming would be impossible. If you charge Arduino Mega, you can use one of three additional hardware serial ports. If you still need to use a single port on Arduino, disconnect Bluetooth module, then program the chip.
Control interface
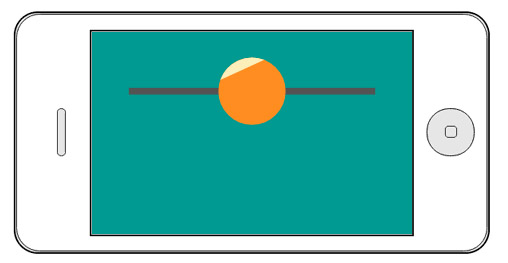
Go to the editor of this resource and construct the following interface controls: just one slider, you can make it big enough.
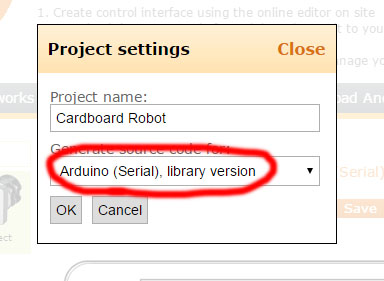
Open project settings, select the target platform "Arduino (Serial), library version". Thus, we specify that we want to get the code for the hardware serial port. Recall that the project settings are opened by pressing a button, the pencil to the right of the project name.
Push the button "Get the code" and download the source code on your computer. Open sketch in IDE Arduino.
Program control
Now we need to create code, which will be the intermediary between the slider and servo. Information about the position of the slider is in the structure RemoteXY field slider_1 (if you renamed your slider, the variable name will match the name of the slider).
/* this structure defines all the variables of your control interface */
struct {

    /* input variable */
  unsigned char slider_1; /* =0..100 slider position */

    /* other variable */
  unsigned char connect_flag;  /* =1 if wire connected, else =0 */

} RemoteXY;
We need to write a mathematical formula that converts the value of the slider position, ranging from 0 to 100 in the pulse duration to control servos. The pulse duration varies from 500 to 2500 (1500 in middle). We obtain the following formula:
int ms = RemoteXY.slider_1*20+500;
In function setup we establish the initial position of the slider to 50 - the middle position. When connecting with the smartphone first thing in the application reads the status of all controls. Thus, the position of the slider set to the middle. Example the simple code:
/////////////////////////////////////////////
//        RemoteXY include library         //
/////////////////////////////////////////////

/* RemoteXY select connection mode and include library */
#define REMOTEXY_MODE__SERIAL
#include <RemoteXY.h>

/* RemoteXY connection settings */
#define REMOTEXY_SERIAL Serial
#define REMOTEXY_SERIAL_SPEED 9600

/* RemoteXY configurate  */
unsigned char RemoteXY_CONF[] =
  { 255,1,0,0,0,11,0,16,13,0,4,160,9,11,86,15,2,26 };

/* this structure defines all the variables of your control interface */
struct {

    /* input variable */
  unsigned char slider_1; /* =0..100 slider position */

    /* other variable */
  unsigned char connect_flag;  /* =1 if wire connected, else =0 */

} RemoteXY;

/////////////////////////////////////////////
//           END RemoteXY include          //
/////////////////////////////////////////////

#include <Servo.h>

Servo myservo;


void setup()
{
  RemoteXY_Init ();

  // TODO you setup code
  myservo.attach(9);
  RemoteXY.slider_1 = 50;

}

void loop()
{
  RemoteXY_Handler ();

  // TODO you loop code
  // use the RemoteXY structure for data transfer

  int ms = RemoteXY.slider_1*20+500;
  myservo.writeMicroseconds(ms);

}
In the code we include servo.h library and define a servo name myservo. In the initialization function setup is initialized library RemoteXY (as in the example), then initializes the servo on pin 9, and set the center position of the slider. In the global cycle function loop the first thing to run the handler RemoteXY (as in the example). It then calculate the pulse duration to the formula. And this duration is passed as a parameter to the function writeMicroseconds, thereby setting the position of the servo shaft, corresponding to the position of the slider on your smartphone, in each cycle of the program.
Connection scheme
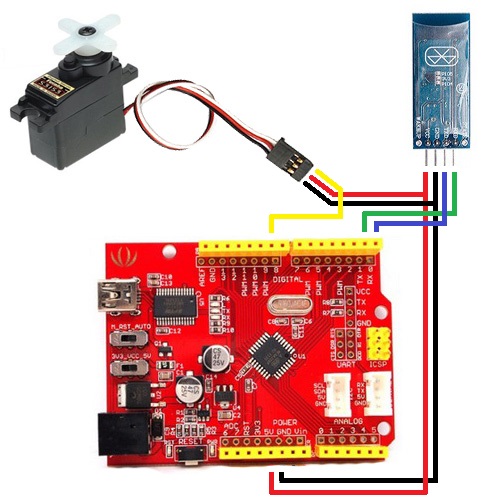
We used micro servo which power is connected directly to the + 5V power supply board Arduino. This is not the right solution, since the servo consumes large enough current under load, and can interfere with the operation of the microcontroller. The correct solution is to power the servos from a separate power. The scheme shows the servo and the Bluetooth module connection to the board Arduino. Bluetooth module HC-06 is connected to the hardware serial port. It should be switched off when programming the microcontroller.
If you have collected a scheme, you have to download the sketch in your Arduino. Next download mobile app RemoteXY, and can connect to your Arduino. By moving the slider on the screen of smartphone/tablet, you can control servo.
 Русский